


")

STEGU installation instructions
Preparation:
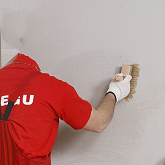
Before installation always check the material for damage and defects. Thoroughly clean the surface to be covered. Remove residues of wallpaper when installing inside! The surface must be clean, sound, hard and flat. A pre-treatment of the substrate with a primer is generally recommended for interior installations.
Take the same precautions for health and safety as applicable to normal tiling and normal handling of cement/concrete-based products. Pay attention to information provided with the materials. If in doubt, consult a suitably qualified professional.
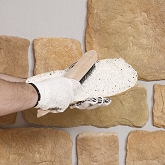
Before the installation the reverse sides of the stone pieces must be free from any existing production residues (e.g. cement dust). Roughening of the reverse side of the covering is useful and improves the subsequent adhesion. (e.g. by briefly rubbing the back sides of two pieces)

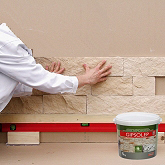
During installation, make sure that material is always taken from several boxes to ensure a uniform application.
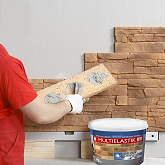
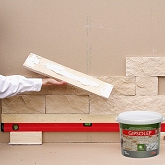
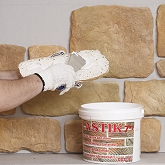
Choose the appropriate adhesive [see Accessories]. When installing apply the adhesive with a 6 - 8 mm toothed spatula using the buttering-floating technique fully to the substrate wall and to the back pages of stone pieces. Then, whether indoors or outdoors, with horizontal - easy sliding - movements, firmly press the stone pieces onto the façade wall.
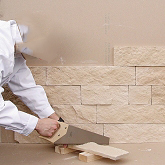
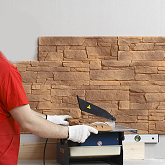
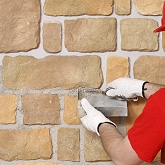
If you need to modify the stone pieces, use a wet tile-cutter or an angle-grinder with a stone cutting disc. After cutting use clear water to clean the surfaces of the stone pieces before installing.
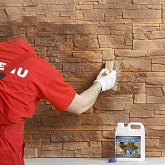
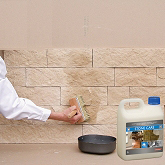
After a 24-hour dry period you may, depending on the application area, seal the facade with a suitable impregnation liquid.